Saturday 24 December 2011

Slaughtering Meat Rabbits

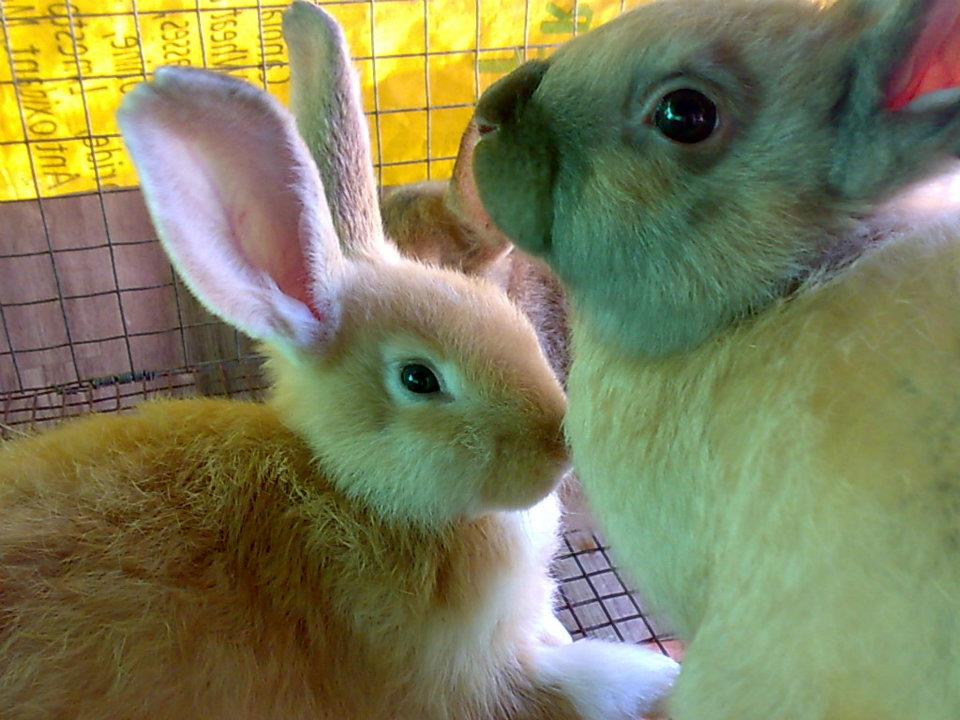
It has been awhile since I made a post about my rabbitry so I thought I will update you on what is going on now with my rabbits. Well, we've been breeding my initial stocks of one Cinnamon doe and one Chinchilla doe since August of last year. We've even slaughtered some 10 meat rabbits during Christmas time when it was time for them to go into the pot. Luckily, we got more males among the litters and these were fattened for table food while we kept the females as replacement does. We are raising meat rabbits after all and that is the purpose for going into this rabbitry, to learn to be self sufficient in producing our own food. We had no hesitation in slaughtering the meat rabbits knowing that what we fed them were healthy vegetation minus the growth hormones and antibiotics that are normally being used in big factories for growing chicken broilers. Please stop reading if you are squeamish about this subject, it is not for the faint of heart.  


We slaughtered the meat rabbits in the most humane way possible and it was done very quickly so as not to make them suffer. Using a 1-inch pipe metal rod about 1.5 feet in length as a tool in holding the rabbit's head on the ground and with both feet on both sides of the pipe, we give a quick pull of the hind legs to snap the rabbit's head. It only takes seconds and it is the most painless way to slaughter them. It is now time to cut off the head and the front paws. Then we tie the hind legs with a rope and hang the carcass upside down so the blood will drip down to the bucket underneath the carcass. Then we start cutting the skin around the hind legs but being careful not to cut the inner flesh, just the skin. Then with a sharp knife or scissors, make a slit from the anus going upwards to cut the skin on each hind legs to open them up. Make a slit also from the anus down to the belly and the neck. Then just pull down the whole skin and it would all come off in one piece and this is dropped into the bucket as well. Once the skin is all out of the way, then we make a slit in the flesh of the belly section to bring out all the intestines, the heart and everything else that has to come out. Then it's just to wash the flesh off and it's ready for cooking. My nephews can now do the slaughtering and it's easy peasy for them now that they know how to do it all by themselves. 


Sunday 20 November 2011

Sexing the Rabbits


In the pictures above, these are all Chinchilla male rabbits. When the rabbits are 2 months old, we check their sex organs and separate the males from the females. It's easy to differentiate the males from the females because the male organ protrudes when you open it while the female has a slit.  One reason for the segregation is that by the time that they reach 4 months old, there is a possibility of interbreeding among the siblings and we try to prevent that from happening. So all the males from the same litter are placed in one cage while the females are placed in another cage. Another reason for the segregation is to decongest them so they will have enough space to play inside their cages. They should be able to run around their cages for their exercise.


We usually put 3-4 males or females in one cage but they should all come from the same litter. We do not mix different breeds in one cage so we do not get confused about their lineage because we now have 3 different breeds such as the Chinchilla, Cinnamon and the latest which is the New Zealand. Some children in the neighborhood likes to buy their pet rabbits from us and it's easier for us to pinpoint the lineage of the rabbits so we do not give a pair of siblings to the same customer. In the pictures above, these are all female rabbits from the same mother. What we do before we sell the rabbits to the children in the neighborhood is to ask their parents first if they are amenable to their children having pet rabbits. We also see to it that they must have a cage or a hutch ready before we release the rabbits to them. This is to ensure that the rabbits will have a good home when they leave our place.


Sunday 9 October 2011

Baby Rabbit Accident


I was on the phone talking with one of my sister-in-laws who lives in Isabela Province yesterday. She said that the electricity just came on that day after several days of having no electricity because of the typhoons. Isabela was badly hit by the previous two typhoons that ravaged the country one week after the other. Thank God that they are safe and sound in spite of the calamity that hit them and that is more important than worldly things. Other provinces are still submerged in water so the residents could not go back to their homes. It may take a couple of months before some residents could go back to their own homes. Anyway, while I was on the phone with my sister-in-law, I heard a loud crying sound from the rabbitry. Every body went to see what it was all about naturally. Everyone thought that a rat may have gotten inside the rabbitry and is biting the baby rabbits. That's because we've seen some rats around recently although the neighbor's cat has been catching them.


 Anyway, it turned out that one of the baby rabbits caught its foot on the door of the cage because it was not closed properly. The kit must have been jumping around as usual when the accident happened. This caused the baby rabbit to cry out loud. After extricating the leg that was caught on the door, the baby rabbit was OK, no limp so far. It's just that the experience must have stressed the baby rabbit and the others as well. In fact, the black buck is having diarrhea today and I am attributing this to the stress that they all experienced yesterday. We're keeping a close watch on him and we're restricting his diet until his stool goes back to normal. All the other rabbits are doing okay so far and the baby rabbits are growing very fast. They really could eat a lot of greens specially the vines and leaves of sweet potatoes that we feed them. I just cleaned out their cages and after one hour, they made a lot of poop again. They're a regular poop machine but I like it because I could use their manure for the garden.  


Friday 7 October 2011

Weaning the Rabbits


The baby rabbits are now 7 weeks old since yesterday, October 06,2011.  We were going to separate the baby rabbits from their mothers yesterday but I was still feeling sick so we had to postpone it. The litters can actually stay all together in the same cage where they were born until they are almost 3 months old. This will help them to keep each other warm since it is getting cold here in the mountains. Late this afternoon, we finally separated the baby rabbits from their mothers. We first removed the two does from their individual cages and placed them in their new cages that were reserved for them. By leaving the baby rabbits alone in their cage and just taking out their mother, this will reduce the stress on the baby rabbits. Then we removed the two smallest rabbits among the litters and these went with their mothers in their new cage as well. They will stay with their mothers for a few days so they can get some more milk and this will also help the mother does from suffering because of a swollen breast. After a week, we will remove the two baby rabbits from their mother  and will put them back with the rest of the litters. We have not sexed the baby rabbits yet as of this writing. We'll do that when they turn 2 months old so they will not be too stressed because of this separation from their mother.  We also took this time to use the small handy butane flame torch to burn off the furs that were sticking on the wire cages of the newly weaned rabbits. After cleaning the cages, we gave them a new feeding bowl and new drinking water bottle.  Then before we left, we fed them some pellets and greens to distract them from the stress of being transferred to a new cage.They were happily munching away when we closed the rabbitry for the day.


Thursday 29 September 2011

Breeding Stock Cinnamon/Chinchilla: 2nd litter


This is the first time for the black Chinchilla buck to be used and these are his off springs. We used the broken-back Chinchilla buck to mate with the two original does. This time, we thought we'd use the black Chinchilla buck since he is almost 9 months old by October 02, 2011. We first took the Cinnamon doe and put her inside the cage of the black buck. As soon as she was in the cage, the buck mounted her but the doe was not having any of that.  She took her own sweet time before she let the buck to ride her. Then she made a pee! This means that the semen of the buck must have been washed away. We had to wait for about 30 minutes until the buck served her twice again before we removed the doe and put her back in her own cage.


We did the same thing with the white Chinchilla but she was also not in the mood. She just kept on running around in circles going 'round and 'round the buck and jumping every time she sees the buck coming towards her. She was very aggressive this morning but apparently, she was not in the mood this evening. It looked like she was ready to fight with the buck and she would put him in a corner and the buck would just lie down. Finally, the buck got a chance and was able to service her twice before we took her out. When she was finally in her own cage with her litters, she was still running around in circles. It must be that she didn't want any of her litters messing with her at that time and she wasn't ready to feed them yet. Anyway,the pictures here are the result of that re-breeding process.


Wednesday 31 August 2011

Two-Weeks Old First Generation Rabbits


One- week old litter of Cinnamon doe


One- week old litter of Chinchilla


Two-weeks old

The kits were out of their nests today and were trying to get their first taste of their mother's food, yummy. The cute little furry things had a good time exploring their surroundings. It's really amazing how fast they have grown since they were born 13 days ago. The children at home spent a few hours with the rabbits just watching them play in their pen. Thank God they are all safe and sound in the backyard rabbitry even after the bad storm that we just had. I was a little bit worried there when the wind was so strong that it broke some branches on the trees. Luckily, the rabbitry was not blown away because where it is presently located in the south west, that's where the wind  comes in which is why we did not put any windows on that wall. Rabbits can survive the cold better than the heat and the wind is not coming directly at them so they should be fine.


Tuesday 30 August 2011

Ventilation in the Rabbitry

We have an on-going storm that is lashing out the city right now with strong winds and heavy rains. I went to check on my rabbits earlier to see how they were coping with the weather and so far so good, they are all sheltered from the storm in their home. The rabbitry house is rain-proof and dry inside. I just had to cover up some of the back part and the sides underneath the rabbit hutches with plastic sacks that were cut in half to protect them from any down draft that may come in from the windows. You see, the windows in the rabbitry has no window glass panes on them, just the 1 x 1 inch wire mesh that we used to take the place of the glass panes. The awning on the roof that covers the windows kept the rains from going inside the rabbitry. There was no smell of amonia build up inside the rabbitry when I opened the door. Thanks to the simple screen windows that allows fresh air to get in and circulate inside the rabbitry.


I cleaned the hutches and fed the rabbits with their daily ration of rabbit pellets and gave them their portion of vegetables. We were feeding them some sweet potato vines and leaves but they finished those greens the other day. We have some chayote or sayote vines and leaves that were gathered yesterday just before the storm came and this is what we gave to them for their greens yesterday and today. We still have some other cut grasses stored for their greens tomorrow and then we will have to gather some more for the next day or so. It's just that with this on-going storm, it is dangerous to get out of the house because you never know what is flying around that could hurt anybody. So I'm hoping and praying that the storm will leave us tomorrow so we could go out and get some greens for our rabbits. The litters are still sleeping snugly in their nest boxes when I last checked on them and they are no longer pinkish because they have grown some furs on their bodies now. I was tempted to get them out and handle them individually but I thought better of it because they looked so contented and happy sleeping in their nest so I left them well alone.

Friday 19 August 2011

Original Stock Cinnamon/Chinchilla Doe: First Litter


These are the first litter of our Cinnamon doe that were born yesterday, August 18, 2011. They're just 1 day old today and we took this picture just this afternoon around 2 PM. They're so cute and wiggly but they're still hairless of course. We gave some greens to the mother first and then took the nest box near the cage's door and uncovered the pups as they were all covered with their mother's fur. As you can see in the picture, we used some old cut-up newspapers as their litter. We can always change the litter should they get wet since we have plenty of old newspapers. This will give us a good excuse to bring out the nest box and check on the babies while changing the litter ha-ha-ha.   


These are the first litter of our Chinchilla doe, born on the same day and perhaps the same time as the Cinnamon litter. I bred the two does on the same day with the same buck. I read on the Internet that the advantage of having two does giving birth at the same time is that you can foster the litter of the other to the doe with a smaller litter. The Cinnamon gave birth to 6 pups but the Chinchilla which is actually bigger in size has more pups like 8 or 9 perhaps. I tried to move the fur that was covering them so I could count their number but they were all wiggling and were piled on top of each other so I was not able to do a real count. I was too afraid of touching them yet just in case I do any harm. In a few more days, I'd be able to do a real count. I am just satisfied and happy that they are all alive and looking good. Oh and by the way, I noticed that when the Chinchilla made a pee, there was some speck of blood mixed in with it. I hope that was just part of her birthing process. Both of the mother does are eating well.


Tuesday 16 August 2011

Expectant Does

               The Chinchilla doe is resting after overhauling the newspapers in her nest box.

We purposefully made the nest box of the Chinchilla doe slightly bigger because she is bigger in size than the Cinnamon doe. We put in the nest box inside the cage on the 28th day after breeding and that is today, the 16th of August. Knowing this, we made some preparations for the delivery and we cut up a lot of old newspapers into 1/2 inch strips and used these as a litter to line up the bottom of the nest boxes. The litter came up to about four inches from the wire bottom. Then we cut up a cardboard box that would fit outside the wire bottom of the next boxes. This will serve as a cover against any down draft coming from the floor of the all-wire cages. It would be easy to change the cardboard at the bottom of the wire box once it gets dirty. All we need to do is to lift up the nest box and change the cardboard underneath where it was sitting on since the cardboard is not attached to the bottom. When everything was ready, we put each nest box inside their individual cages. The two does didn't know what to make of their nest box at first and they started chewing on the wood. Then they got inside their individual nest box and started to dig in and brought everything out! What are we going to do now?

                       This is the Cinnamon doe resting after she re-arranged her nest box.

We were observing them as this is our first time to raise rabbits. When they got tired of jumping in and out of their nest box, they would take a rest and would stretch out to their full length on the wire floor right next to their iced-water bottle. Then after a few minutes, they would go back inside the nest box again and would bury themselves in the newspaper cuttings and they would continue to dig. After some time, they came out of their nest box and we noticed that they were gathering the newspapers in their mouth that were strewn all over and they were putting them back inside the nest box! They were rearranging the newspapers in the nest box the way they wanted it done! So don't try to rearrange their nest, just let them do as they please because they know best what they want and how they want their beds done. To us newbies, we thought that was really amazing because we've never seen rabbits making their nest before. The size of the nest box that we gave them was really perfect for each of them. They can turn around inside and they could get in and out of it easily as well. So now it’s just a wait and see because they can give birth within two days after putting in the nest box or any day and anytime from now. 


Wednesday 10 August 2011

Making the Rabbit Nest Boxes

Since we do not have any scrap wood materials around the house, we had to buy some new ones to make the rabbit's nest boxes. We bought two pieces of 1x8x8 rough wooden boards and it costs us 651.00 pesos ( six hundred fifty one pesos in Philippine money). Since we were able to make three nest boxes out of these materials, the cost of one nest box is only 217.00 pesos. It would have cost us more if I had gone to a wood shop and have them made the nest boxes as I had originally intended to do. We used a 1/2 x 1/2 hole wire materials with gauge # 14 for the bottom of the cages. These wires are actually left over materials from the all-wire hanging cages that my brother Joe made so they were all put to good use, nothing wasted.

My brother Joe making the sides of the nest box out of a 1/2 inch x 8 inches wide by 10 feet long board.

Assembling the sides of the nest box.

Four sides done.

Now he's putting the top part of the nest box.

The rabbit can use the top part of the nest box if she wants to get away from her kits.

We used 1-inch finishing nails to join the boards together. 

Now comes the bottom part with the left over 1/2 x 1/2 inch wire floor.

The left over wire floor is attached to the bottom with no. 1 staple wires. 

The all-wire bottom will be covered with plywood underneath to make a double bottom.

All done!

Showing the top part of the nest box.

Making the second nest box a little smaller for the Cinnamon doe as she is smaller than the Chinchillia doe.

Same all-wire bottom but shorter in length.

Showing the three nest boxes with all-wire bottoms. 

One 18- inches long and two 16- inches long nest boxes all done.


Tuesday 9 August 2011

Rabbit's Drinking Bottle, Feeding Cups


This is a medium size drinking bottle that I give to the bucks. It has a drinking nozzle at the end and the rabbits learned that if they lick on the nipple, water will come out and they can suck it up. It's a sanitary way of giving them clean water.  The bottle is attached to the side of the walls by a piece of string and the height is adjusted according to the size of the rabbits.


This is a large drinking water bottle that I give to the pregnant does. Knowing that the does are pregnant, I bought a large drinking water bottle for them so they could share it with their litters. It is also kept in place by an adjustable spring wire.We clean out all the bottles and the feeding bowls with Zonrox to disinfect them.


This is a stainless steel bowl that I use as a feeding cup for the rabbits. It can be easily hooked up by its holder on the wall of the cage at any height and it is detachable. It is easy to just lift up the cup from its holder and the holder will remain hooked on the walls. Initially, I bought several plastic feeding cups with a wide base at the bottom but the rabbits would sometimes tip the cups over together with the feeds. So when I found these stainless steel cups in a pet shop, I bought some of them.


This is another hard plastic feeder that I use with the does. It has a screw outside the cage and the cup is detachable from its base. Just turn the cup a little bit and it would come out from its base while the base remains screwed on the wall. I like this best because it is sturdy and they could not tip it over. I actually ordered 10 pieces of these feeding cups at ACE Hardware store at SM mall here in Baguio as that is where I bought the two that I am using now. I placed my order in sometime in May and the saleslady who assisted me said that it would take two weeks at most so I said okay. June, July and now it is August and my order is yet to come. I kept following it up with the saleslady every time that we go to the store to buy something but she always tells me the same thing, that nothing has arrived yet although she already placed my order. Maybe one of these days I will eventually get it.


Monday 8 August 2011

Rabbit Manure Worm Bin


Behind the door in the rabbitry is a black plastic compost bin with a white cover. This is where we put the strained rabbit manure. Once it is half way full, we put the earthworms inside and continue to fill it up until it is 3/4th full then we take the bin out and put a new plastic bin in its place.


The manure bin in the picture above is almost full but not quite yet.  Around the four sides near the top, we drilled many small holes to serve as ventilation for the earthworms. We also drilled many small holes on the white cover for additional ventilation purposes. I cut up some old newspapers and soaked these in a bucket with water for a few minutes. Then I squeezed out the excess water and spread the newspapers at the bottom of the box to serve as lining. Then everyday, we put the strained rabbit manure in the box. We used a black plastic box for composting the rabbit manure because the earthworms thrives best in darkness.    


The pink strainer (not shown in picture) is just on the left side but it is near the worm bin. This is why we placed the worm bin under the window behind the doorway as it is easy for us to take the drained manure and flip over the contents into the worm bin in one smooth single flow. It simplifies the work of emptying the pink strainer with the manure.


Sunday 7 August 2011

Cleaning the Rabbitry


By extending 2 feet of the suspended cages towards the chicken coop, this allowed us to have a 3-feet walkway between the left wall cages and the middle cages as seen in the picture above. The red stool in the middle is used by yours truly because I am a short woman and this helps me to reach for any rabbits at the upper levels. Underneath the left wall cages are several plastic containers, this is where we keep the rabbit pellets. The 1-litter bottles on the floor are filled with water and this is what we use when we clean the linoleum floor under the cages. A stick broom and a dustpan is also on the floor near the bottles.


These are the cleaning utensils that we use in the rabbitry which includes a sponge, a hand towel, a hair brush for grooming the rabbit's hairs, 3 different kinds of brushes, a scraper and a handy blue torch with a small can of propane gas that we use to burn off the stray hairs that often clings on the wire walls. This is an easy way of cleaning the all-wire cages of hair and parasites by burning them with a handy blue torch.  

   
Since the floor under the cages were made to slant to a certain degree at an angle, this allows the free flow of urine and manure to fall into the linoleum and down to the half cut orange PVC pipes which serves as gutters as shown in the picture above. These orange gutters are then inserted into the cut that was made on the black PVC pipe. The upright black PVC pipe is another scrap material that we have kept in the old pigsty over the years knowing that it would come in handy someday and it did.  


This shot was taken from the doorway of the rabbitry showing the back of the upright black PVC pipe that is tied with a wire on the steel frame. This black PVC pipe is where the urine and the manure drains and these are deposited into the plastic at the bottom. The plastic at the bottom is actually a 1-galloon plastic water bottle and we just cut off the top part so this serves as a wastes bucket.   


The bucket that contains urine, manure and cleaning water is then poured into this pink plastic strainer with another 1-gallon plastic water bottle at the bottom. We cut off the bottom part of this plastic bottle and turned it upside down and the mouth of the bottle is then inserted into a 2-inch diameter hole on the floor. This hole on the floor has a 2 inches PVC pipe that is buried into the concrete floor and this is where the waste water and urine is drained. So only the manure is left into the pink strainer and once it is dry, we put them into a bin with a cover.


Saturday 6 August 2011

Rabbit Housing: Cages on the Left Wall


These are the suspended cages on the left wall of the rabbitry. There are two cages on the upper level. Each cage is divided into two so this gives us four individual cages. The size dimension of each individual cage is 2 feet wide by 2 feet long by 18 inches tall. These will be used for our replacement does in the future. There are two cages on the lower level with a size dimension of 2 feet by 4 feet by 18 inches tall. These will be used as grow-out cages for the litters. The back part of this left wall in the rabbitry is covered with a 1/2 x 1/2 inch wire mesh material from the ceiling down to the floor of the suspended cages because on the other side is already the chicken coop area. The wire mesh material prevents the chickens from entering the rabbitry and it still allows for the free flow of fresh air all around the entire building.


The suspended cages on the left wall are actually protruding by 2 feet towards the chicken coop as shown in the two pictures above with the chicken door open. Underneath these protruding cages is a space of 2 1/2 feet, so the chickens actually can still use the bottom space. 


In my research on the Internet about raising rabbits, I found out that rabbits do not like sudden movements. Since all of our cages are made out of all-wire materials, and the wall division between the chicken coop and the rabbitry is also of wire mesh material, this means that any activities that the chickens would be doing while they're inside the coop could be seen by the rabbits. So we covered 3/4 of the height of these suspended cages at the back with linoleum material as seen in the picture above. This will screen off the activities of the chickens in their coop and the rabbits will not be able to see them from their suspended cages. The remaining 1/4 space of the height of the suspended cages are not covered so there is still a free flow of air in and around the whole rabbitry and the chicken coop.